In this guide we explain everything you need to know about how to get started using PGP encryption. We walk you through key pair generation, message encryption and message decryption in a step-by-step manner, giving you pointers on how to protect your privacy along the way.
I. What is PGP?
PGP is short for “pretty good privacy” and refers to an encryption program used for communication and data. In the cryptocurrency world, PGP is used as a source of identity verification and a way for otherwise anonymous parties to confirm that they are communicating with one another. It is also an increasingly common way for anyone to authenticate a message to the outside world; especially public figures who are prone to impersonation.
II. How Does PGP Work?
PGP encryption works by serially combining several cryptographic techniques together, including hashing, data compression, symmetric-key cryptography, and lastly public-key cryptography. Users generate a key pair, consisting of the following:
- Public key (think of this as a username or email address which others will use to encrypt messages to be read by you)
- Private key (think of this as the password needed to decrypt the messages sent to you by others)
To send a PGP encrypted message, the sender encrypts the text they wish to send using the recipient’s public key using a PGP client like Kleopatra. Public keys can be stored for easy reference in the client and the encryption can be done with just a few clicks. The output of the encryption process is then imported by the recipient, who uses their private key to decrypt the text.
III. How secure is PGP encryption?
It’s been 30 years since PGP was first released as an open-sourced, non-licensed project, and in that time, no one has ever managed to “crack” or reverse-engineer the encryption. Accordingly, no one has managed to decrypt a PGP-encrypted message without the corresponding private key. The cryptography behind PGP is solid and failures emanating from its use stem from human error. There have been some poorly configured PGP and email clients that leaked key data during sophisticated phishing incidents in the past, but if you stick with a trusted client and maintain good security practices you should have no problems with your PGP experience.
IV. Before Getting Started: Privacy Considerations
First things first: Decide what you plan to achieve with PGP, and what degree of privacy you are ultimately seeking. This is an important decision because it affects what you should be doing before you even download privacy tools like PGP utilities. Consider whose attention you are hoping to evade. If this is your internet service provider (ISP), Google or anyone else potentially monitoring your online movement, you will want to download the software using the Tor browser. If this isn’t such a big deal to you, downloading a PGP utility from a regular browser is fine and will not lessen your security cryptographically.
In terms of privacy, taking things a step further would involve breaking the connection that you ever downloaded Tor (or any PGP utility) in the first place. Even though your ISP does not know what websites you are visiting when you connect to the Tor network, they can see when you do connect to the network. To avoid this, you can download Tor using the TailsOS, which is a Linux-based operating system that runs on a USB drive and forces all internet traffic through the Tor network. Tails also includes handy PGP tools for easily encrypting and decrypting messages, which we show you how to do in this guide.
V. Downloading a PGP Client
We recommend using the Kleopatra client, which is open-source and relatively easy to use. It is published by OpenPGP, a non-profit organization for the development and standardization of PGP protocols. It is part of a suite of open-source PGP utilities called Gpg4win.
If you are running Linux, download Kleopatra here.
If you are running Windows, download Gpg4win here.
For the purposes of this guide, we will be demonstrating the Windows installation. The download page should look something like this:
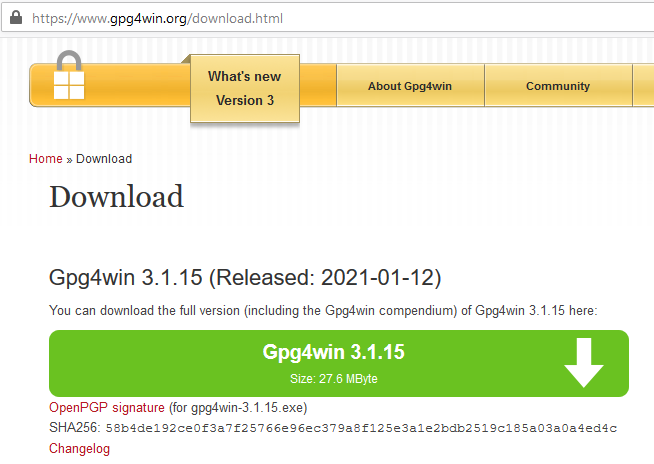
If it doesn’t, double-check to make sure you are at the right URL, which should read: https://www.gpg4win.org/download.html
This is important because you want to make sure you are only downloading an official PGP client that has been inspected and approved by the community. Use of anything else could lead to drastic consequences, such as having messages intercepted or your identity stolen.
Clicking on the big green button will bring you to a donation request screen.
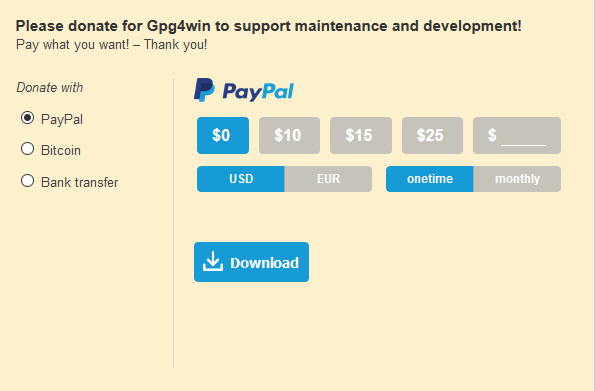
You can leave the developers a donation using PayPal, Bitcoin or bank transfer (the BTC option being best for privacy purposes, of course). You can also choose to donate zero. Click “Download” to begin downloading the client.
Note: If you don’t see the “Download” button, try enabling JavaScript in your Tor browser and then refresh the page.
VI. Installing the PGP Client
After you have download the Gpg4win installer, you’ll be brought to a “thank you for downloading…” screen and there will be a popup asking you if you want to install an external file type. Click “Download File” to continue, saving the client into your Downloads folder (or Tails USB drive if appropriate). The “thank you” screen will instruct you to “check the integrity of the installer” before proceeding, which is good for the thorough-minded but not entirely necessary as we have downloaded it from the official site.
Following the rest of the steps offered on the screen, double-click your freshly downloaded Gpg4win installer to extract the contents and install Kleopatra. The setup screen looks like this:
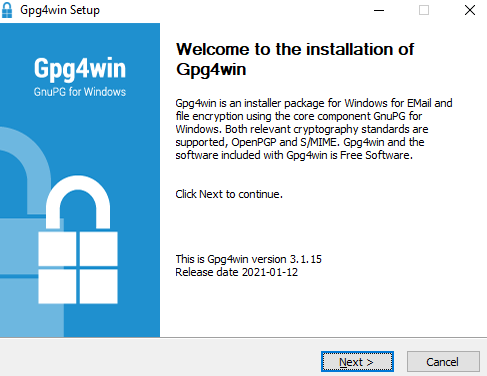
Click “Next” to continue. You will now be asked which components you wish to install, with Kleopatra and two other options checked by default.
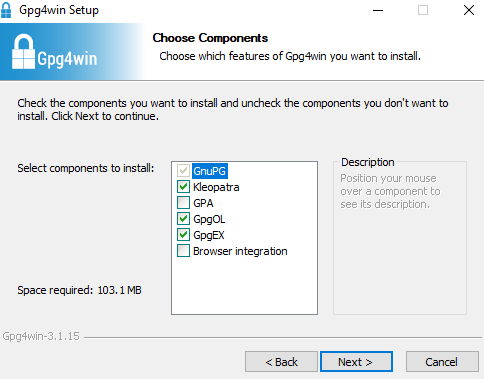
The two unchecked options are not essential and in all likelihood you will not need them. Press “Next” to continue. You will now be asked where you want to install the program. For this demonstration, we will be installing it in the default directory. After clicking to install, the screen will show installation progress, ending with “Installation Complete” displayed at the top. At this point, click “Next”. Installation will have finished, and you can choose to run Kleopatra now (set by default). Press “Finish” to open Kleopatra.
VII. Generating a PGP Key Pair
Luckily, Kleopatra features a pretty intuitive UI that makes setting up your first PGP key pair very simple. Right from the first time the program is launched, you can see the option to create a key pair in the center of the screen.
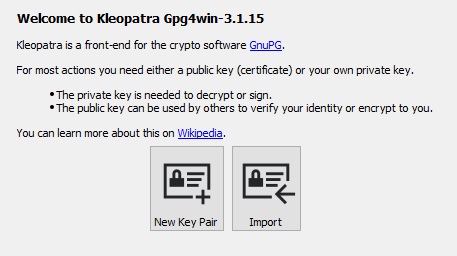
Click on the “New Key Pair” button to get started. You’ll now be asked if you want to associate a username and email address to your key pair, but these are both optional.
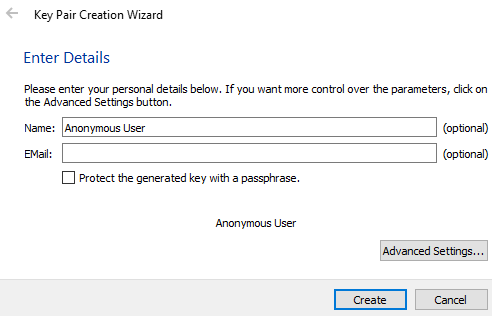
If you want to change the expiration date of your key from the default of two years after creation date, press the “Advanced Settings” button. Here you can also customize the strength of the key, but this is unnecessary.
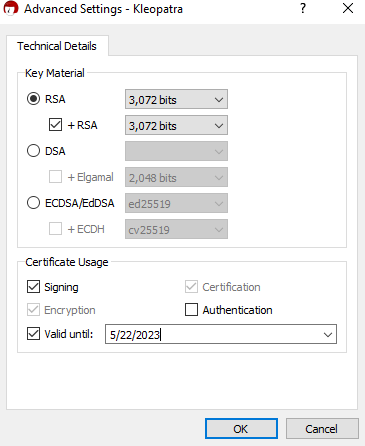
There is a chance older PGP clients may not be able to recognize keys generated using advanced options, and there is little to be gained by altering these options anyway, so we recommend against doing so.
It is also possible to alter what permissions you want enabled with your key. Unchecking the “Valid until” box means that your key will never expire. After you have set the options for key generation the way you want them, press “OK”. Double-check your details, decide if you want to protect your key with a passphrase, then press “Create”.
You will then see a message that says the key pair is being generated. If you have a slower computer, this task could take a couple of minutes to perform. When everything is finished, you will be presented with the following screen:
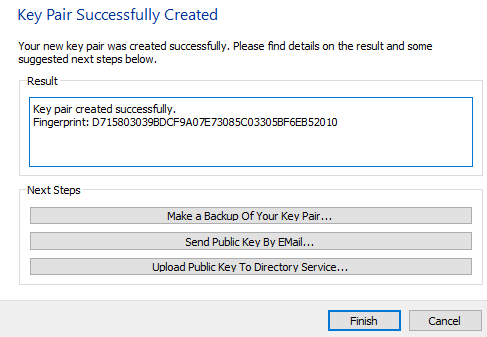
The Fingerprint is a shortened version of your public key that cannot be used to encrypt messages but represents ownership of that key. Press the button that says “Make a Backup Of Your Key Pair”. This will create a file that you can save elsewhere and re-import into Kleopatra should something happen to your computer. After doing this, click “Finish”.
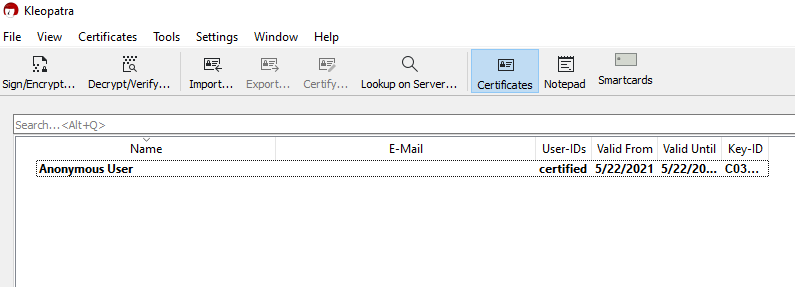
You will now see the key you created listed as a “Certificate”.
VIII. Finding Your PGP Public Key
Let’s say you want to copy/paste your public key onto a website profile so that others may send you encrypted messages. To do this, first double-click on the certificate whose public key you wish to view. In our case, we only have one entry, “Anonymous User”, so we will be clicking that one. This will bring up the details and options for that certificate.
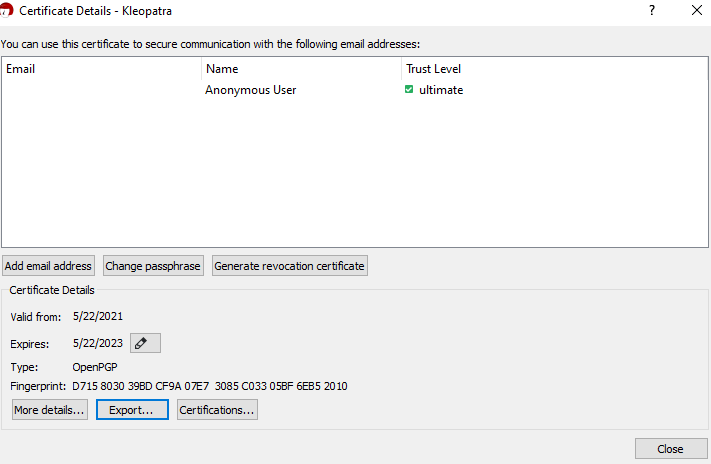
To find your public key, press the button that says “Export”. This will open a text box that contains the key necessary to encrypt messages.
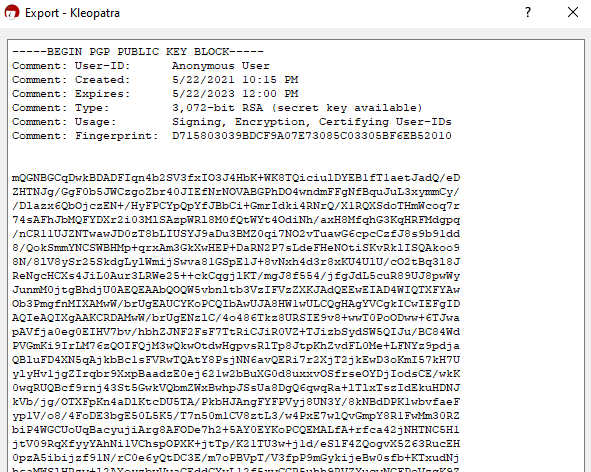
Select and copy the entire contents of this box, paste them into a blank text document and save it somewhere secure, along with your certificate backup, for instance. This is your PGP public key.
IX. How to Encrypt a Message
Now that we have generated a PGP key pair, let’s practice encrypting and decrypting something with it. Try to follow along with our example. The message for our example will be the following (minus quotation marks):
“PGP is pretty good privacy.”
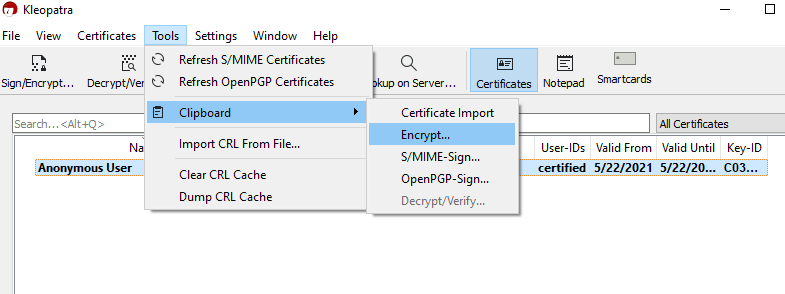
First, copy the text in between the quotation marks into your clipboard. Next, go back to Kleopatra. Under the “Tools” menu, hover over “Clipboard”, and press “Encrypt”.
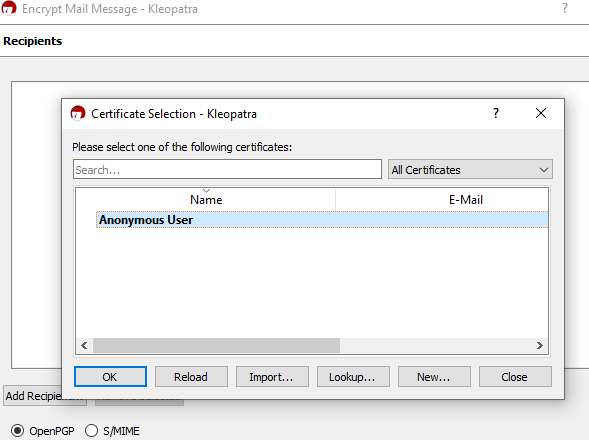
Next, click “Add Recipient”, click on your certificate to highlight it, and then click “OK”.
After that, click “Next” to begin the encryption. The process will only take a couple of seconds and be followed by displaying a message that says “Encryption succeeded.” Press “OK”. The encrypted message has now been copied to your clipboard. Paste it in a new text document. It will look something like this:
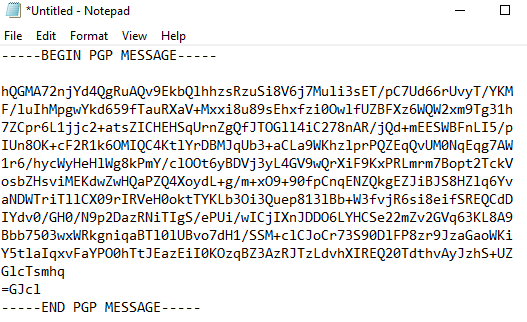
This is what an encrypted message looks like. It can only be decrypted by the owner of the private key which corresponds with the public key used to encrypt the message. In this case, that private key belongs to you, so we will use the message you just generated to practice decryption next.
X. How to Decrypt a Message
First, select and copy the entire contents of the encrypted message. This includes everything that was just output by Kleopatra, starting with the first dash and ending with the last. Go back to Kleopatra, click your PGP certificate once to highlight it, select the “Tools” menu, go down to “Clipboard”, and select “Decrypt/Verify”.

Kleopatra will now show the status of the decryption, followed by a message that says “All operations completed.” The decrypted message has now been copied to your clipboard. Press “Finish”.
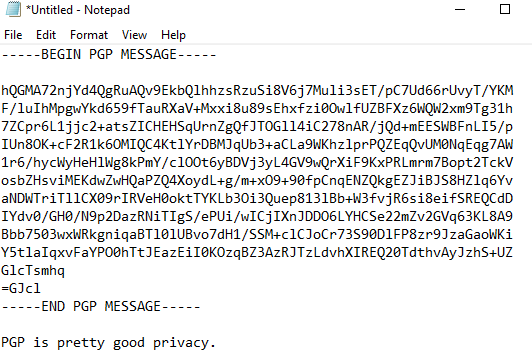
Next, paste the decrypted message beneath the encrypted one. If everything went correctly, you should see that you just pasted the words, “PGP is pretty good privacy.”
And that’s it. You now know how to generate a PGP key pair, encrypt a message using a public key, and decrypt a message using a private key.
Take caution in protecting the integrity of your key and Kleopatra client. Enabling the option to require a password to open the client is a good start. This can be done by right clicking the PGP certificate entry and selecting “Change Passphrase”. Note that from here you can also access the options to export your certificate, revoke your certification, back up and even print your private key – features which will likely be handy to any long-term PGP user.
As a parting reminder, take extra special care when using advanced PGP utilities not associated with the Gpg4win utility suite as they sometimes contain bugs which can be used as attack vectors to intercept sensitive information or even your private key itself.
PGP remains a staple among privacy enthusiasts and can be considered a reliable encryption technique. Whatever problems it causes the user, however, are beyond the problems of the technology itself. As with any technology, these problems can be reduced by having a working understanding of the tool being used, which is why we recommend practicing with Kleopatra a few times before attempting to put it to real-world use.


I have no idea what any of this means. I also don’t have computer, Linux, windows, I do not have. I use android phone
Then you are screwed I think. I am a newbie but I think a computer is required